BEFORE & AFTER: TOY STORAGE
/
This post is sponsored by PureBond.
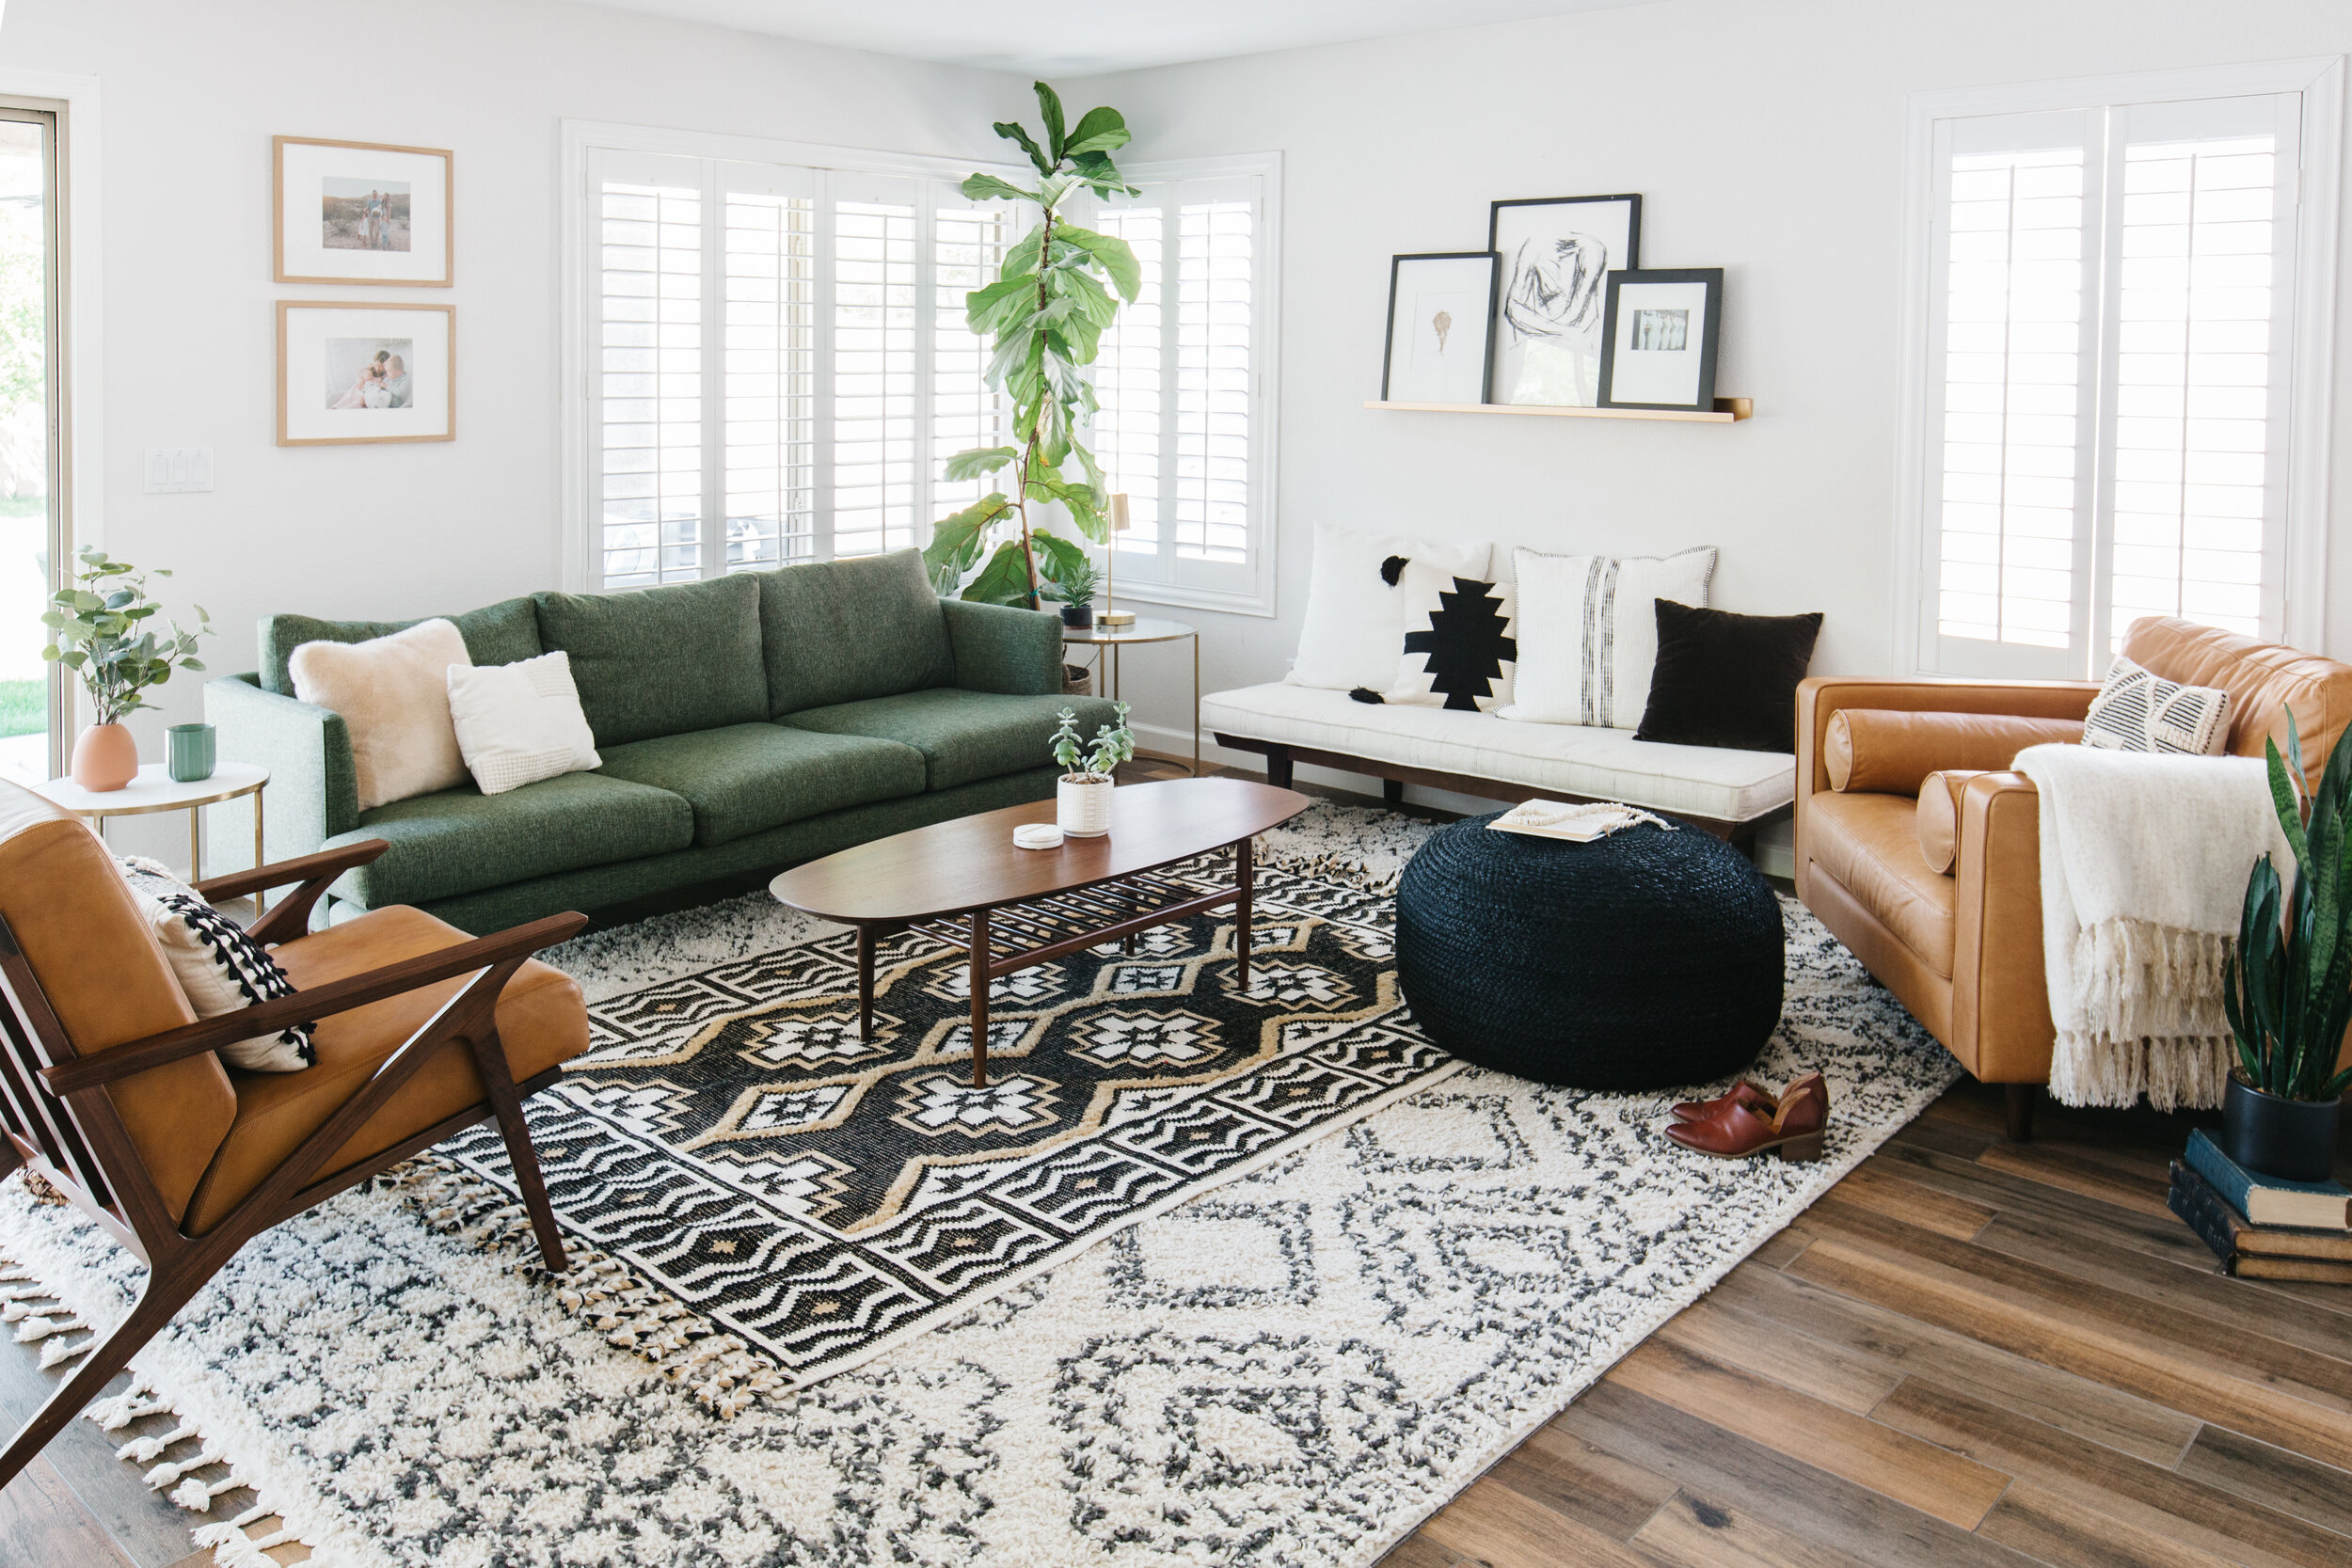
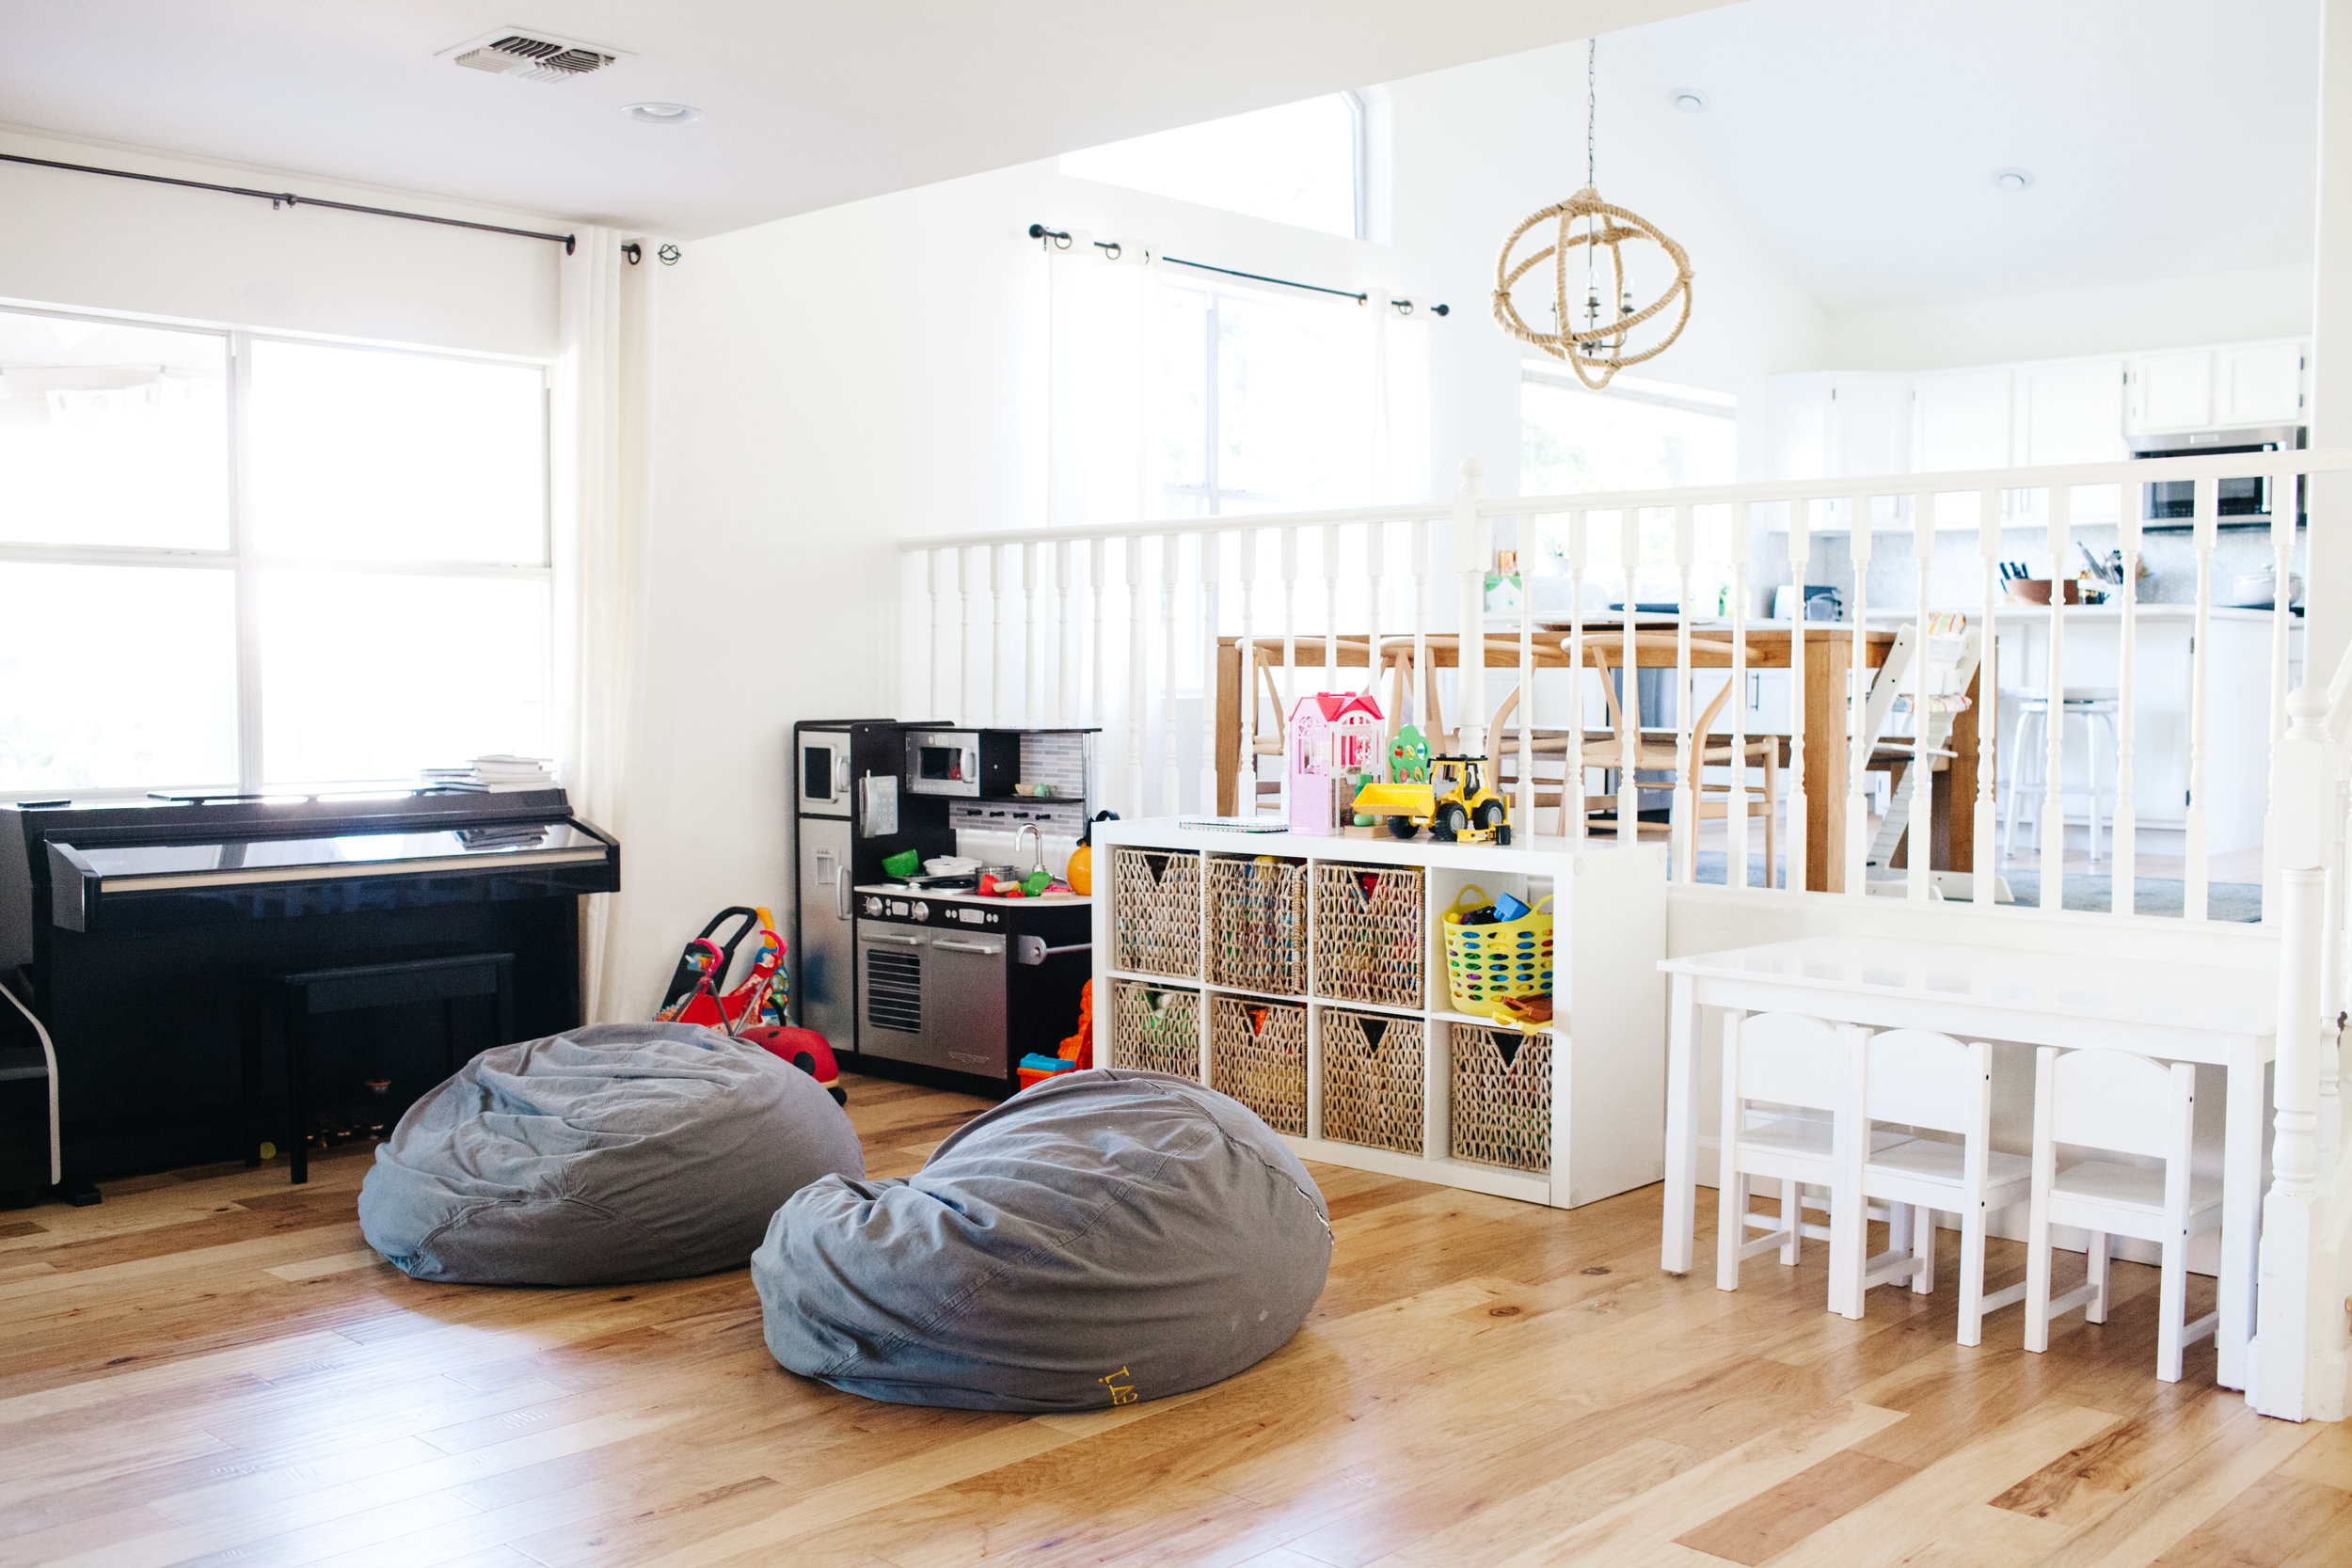
Our open floor plan posed a decorating challenge for me. There is an awkward, transitional space connected to our family room and our kitchen. I really didn't know how to furnish the area, and shortly after we moved in it became the toy dumping ground (see below). What I love about the space is that I can see the kids playing from every angle of our first floor, but I hated all of the toys everywhere. The room always looked messy and cluttered. So, I had the idea of creating a storage bench that would serve as both a toy box and extra seating. This would have to be a custom project, and PureBond and Pneumatic Addict were excited to help bring this idea to fruition.
After searching through Pinterest to figure out what I wanted my bench to look like and what type of materials I would need, I reached out to Elisha from Pneumatic Addict. She is a fellow blogger with serious DIY skills. She designs and shares her plans on her blog as well as the process of how to create each DIY. When I reached out to her about this idea she told me PureBond plywood was exactly what we needed for this. Sure enough she was right.

They sell high quality plywood in a gorgeous maple color that is sourced and manufactured in the United States. It also has a UV protectant to avoid discoloration over time, and is formaldehyde-free ensuring a safe product for my kids. A lot of times you'll see unfinished edges on plywood, but they also have a iron-on banding that matches the color perfectly to create a finished, rich look. Once we measured the area, we ordered what we needed and PureBond delivered it straight to Elisha's doorstep. You can get PureBond from your local Home Depot.
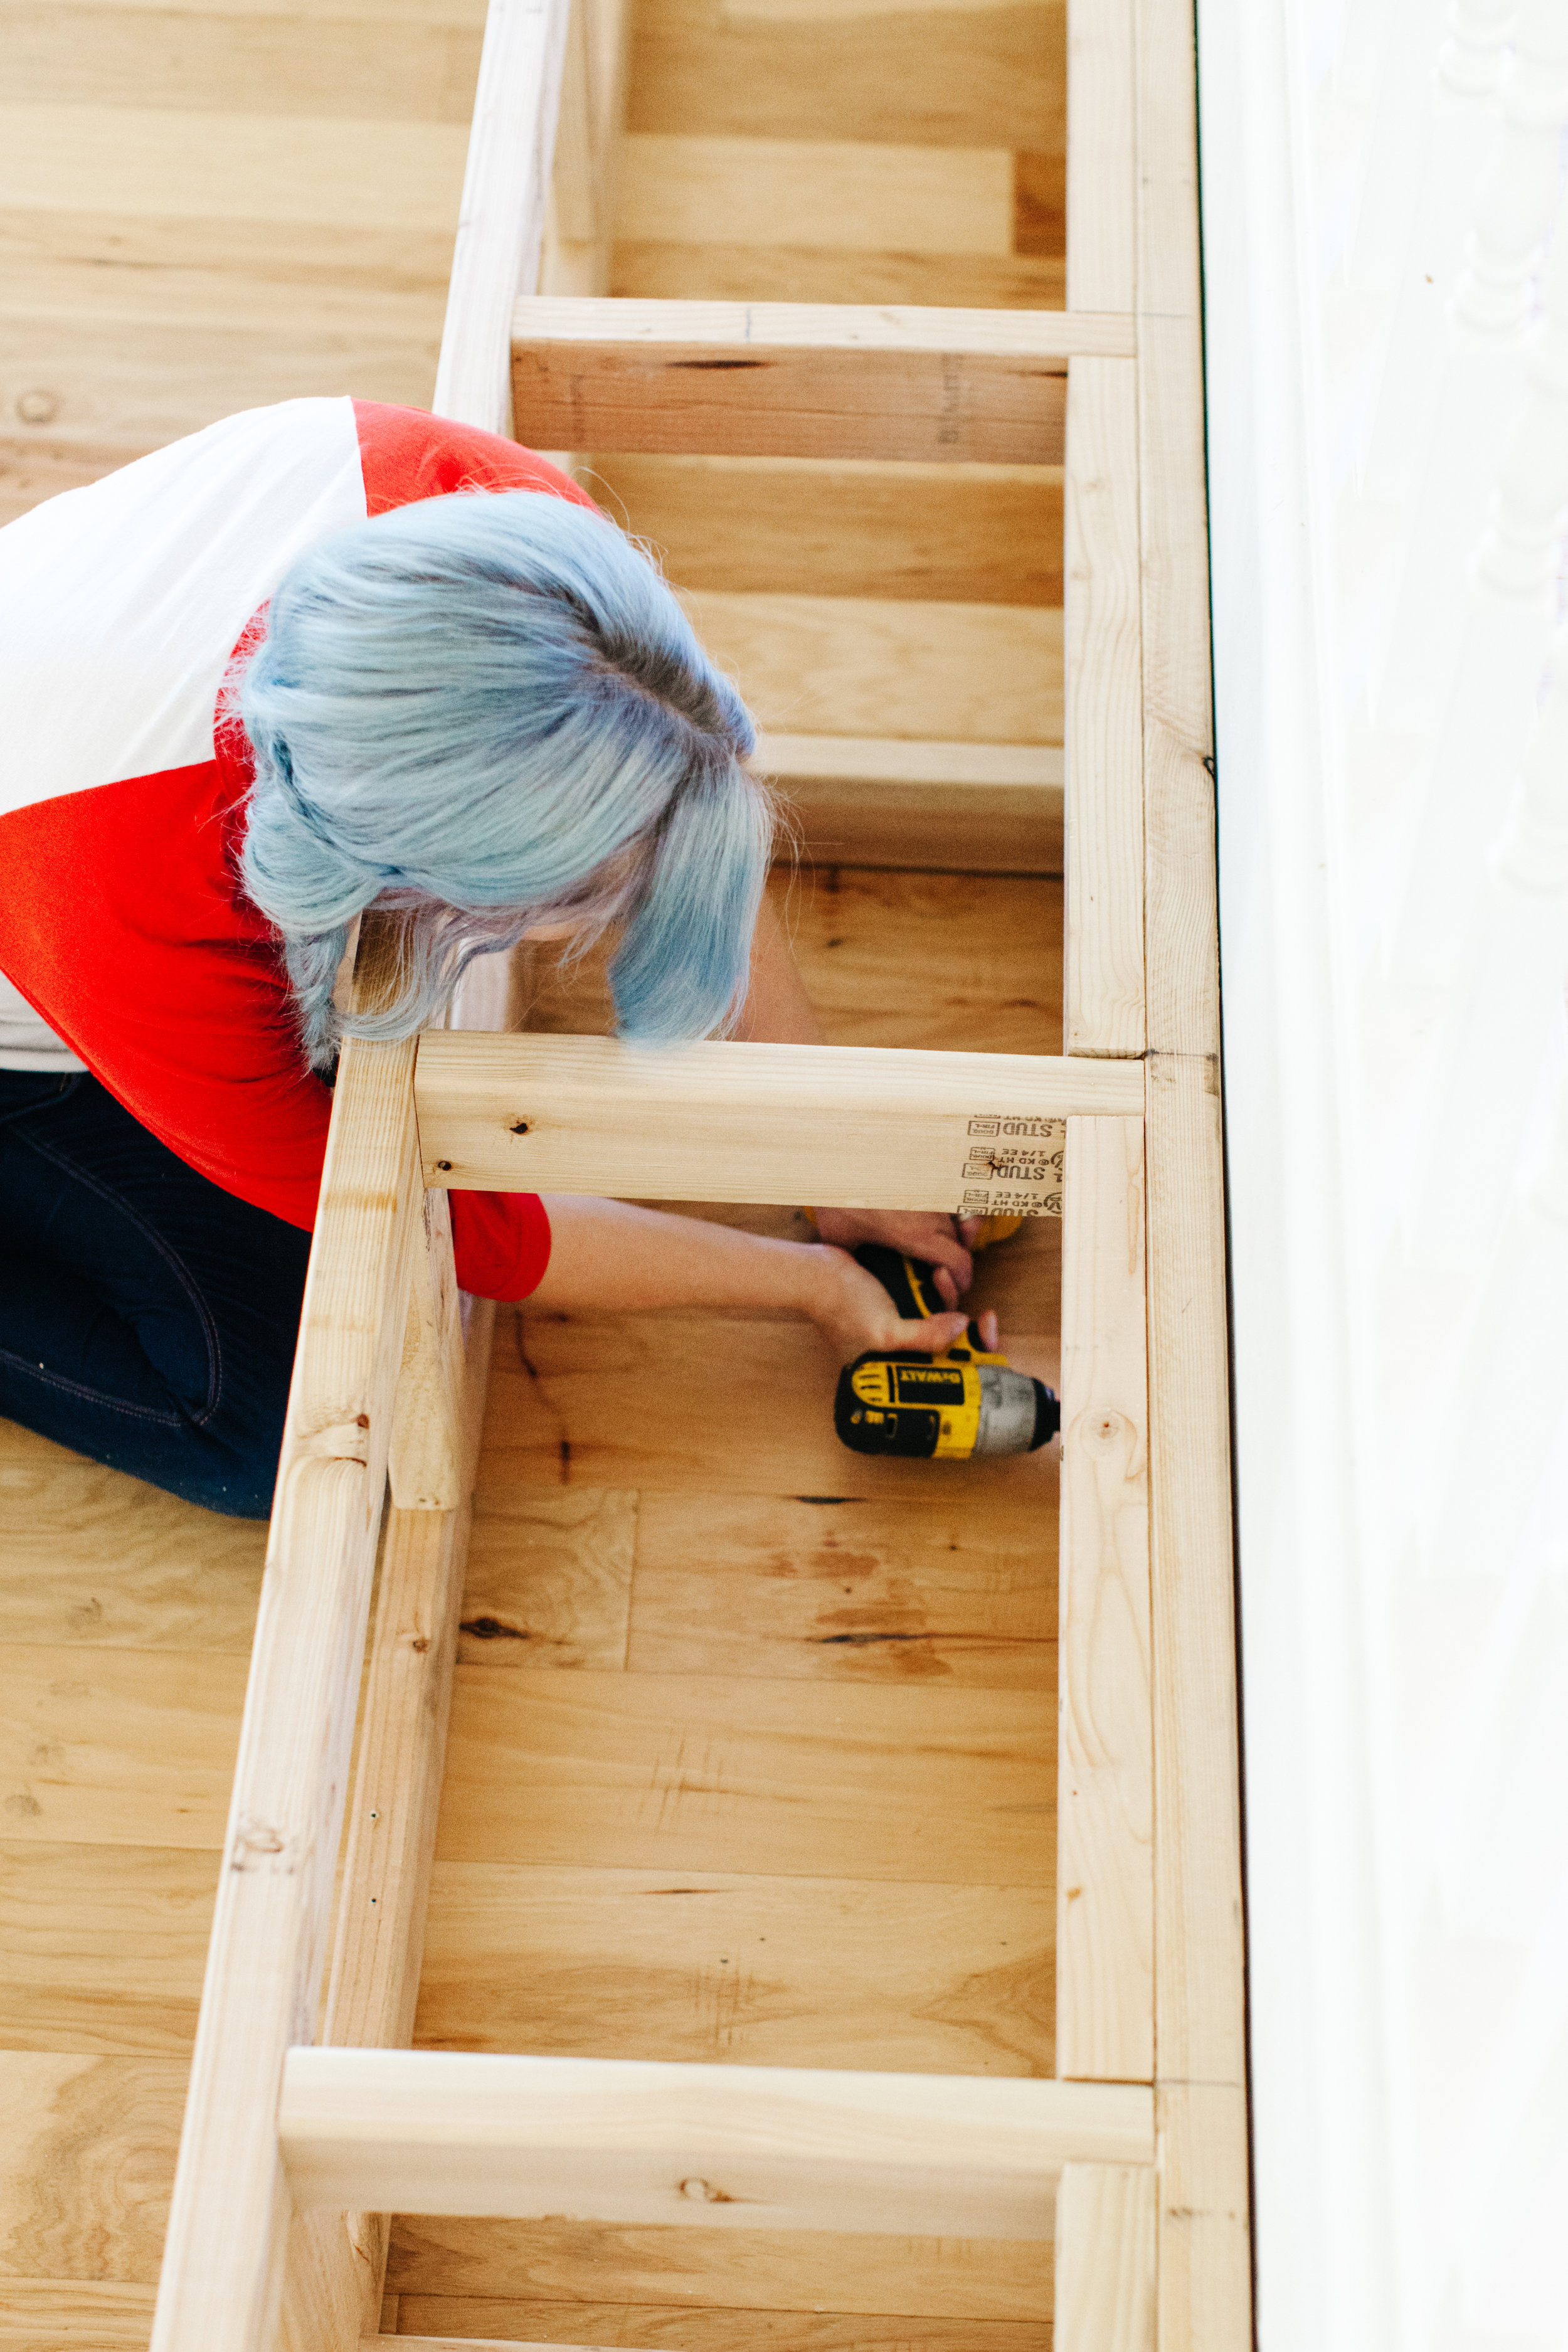
Elisha built the frame at home and then brought it over and installed it. It took about a day of work to put it all together. One of my favorite parts of Elisha's design is how she thought to install struts on each lid so that the lids wouldn't come crashing down on Elle or Levi's fingers. When you try to pull the lid down it slowly closes no matter how much force you put on it. (Get the full design details and DIY process on Elisha's blog).


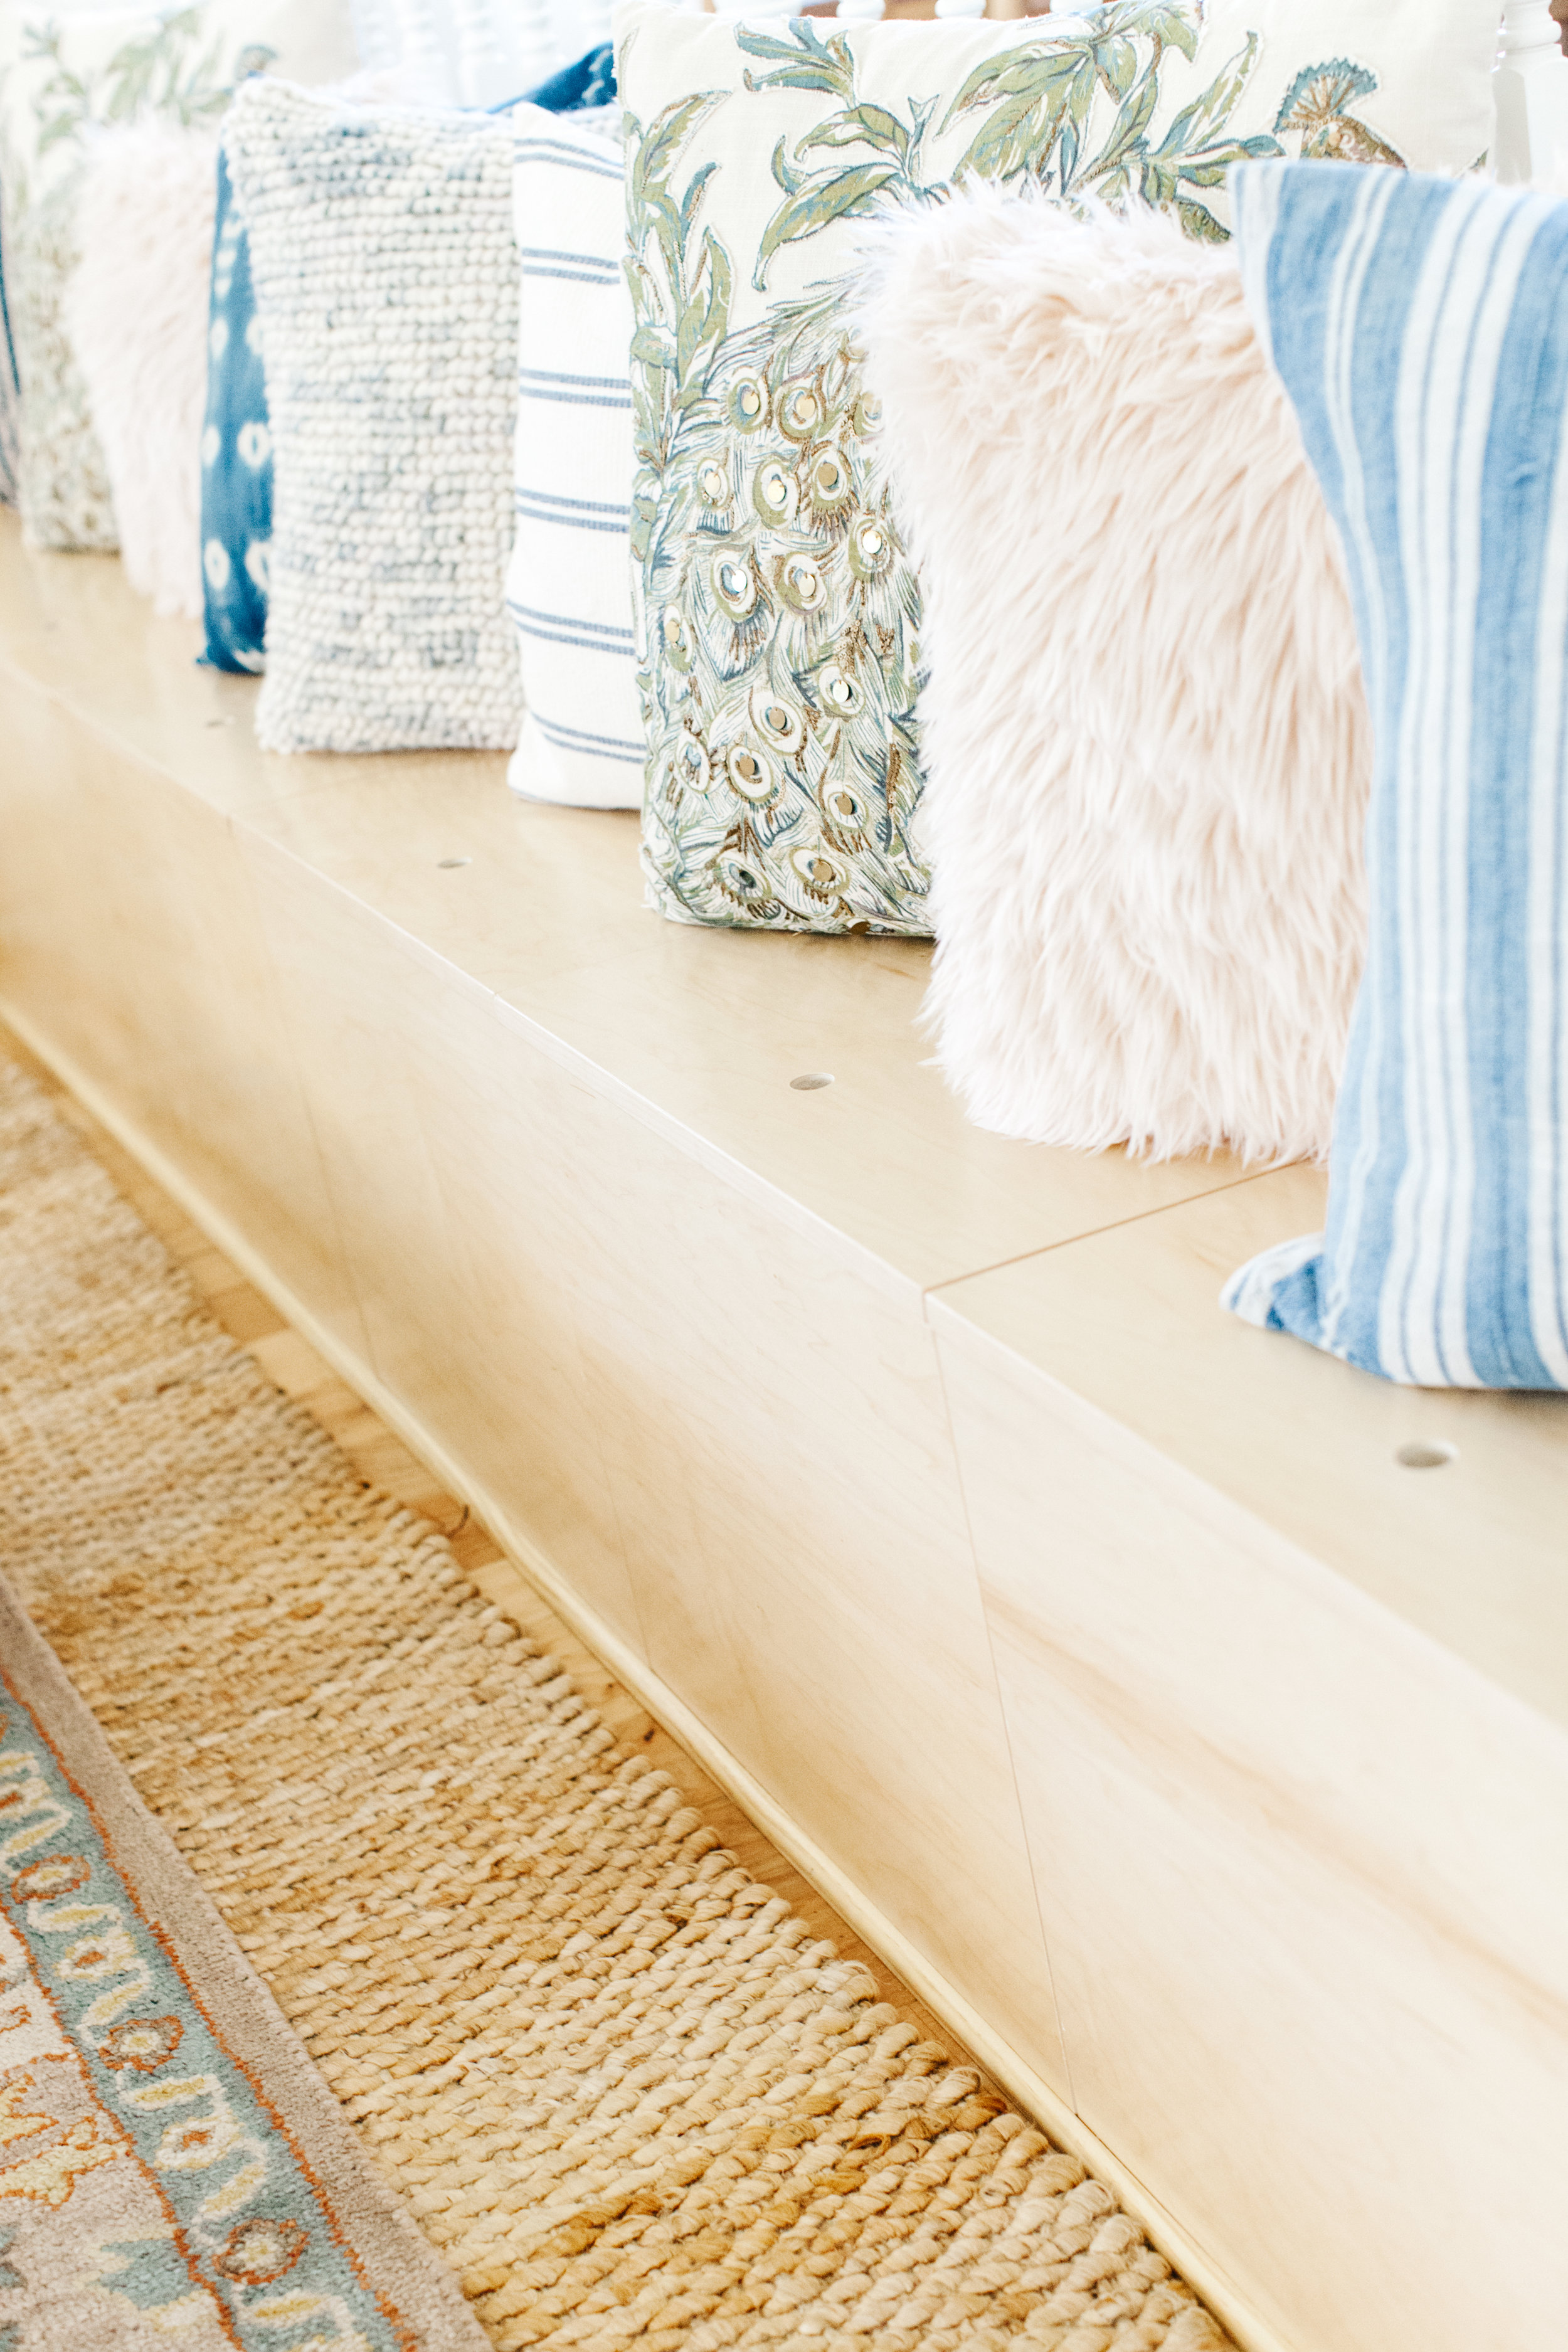
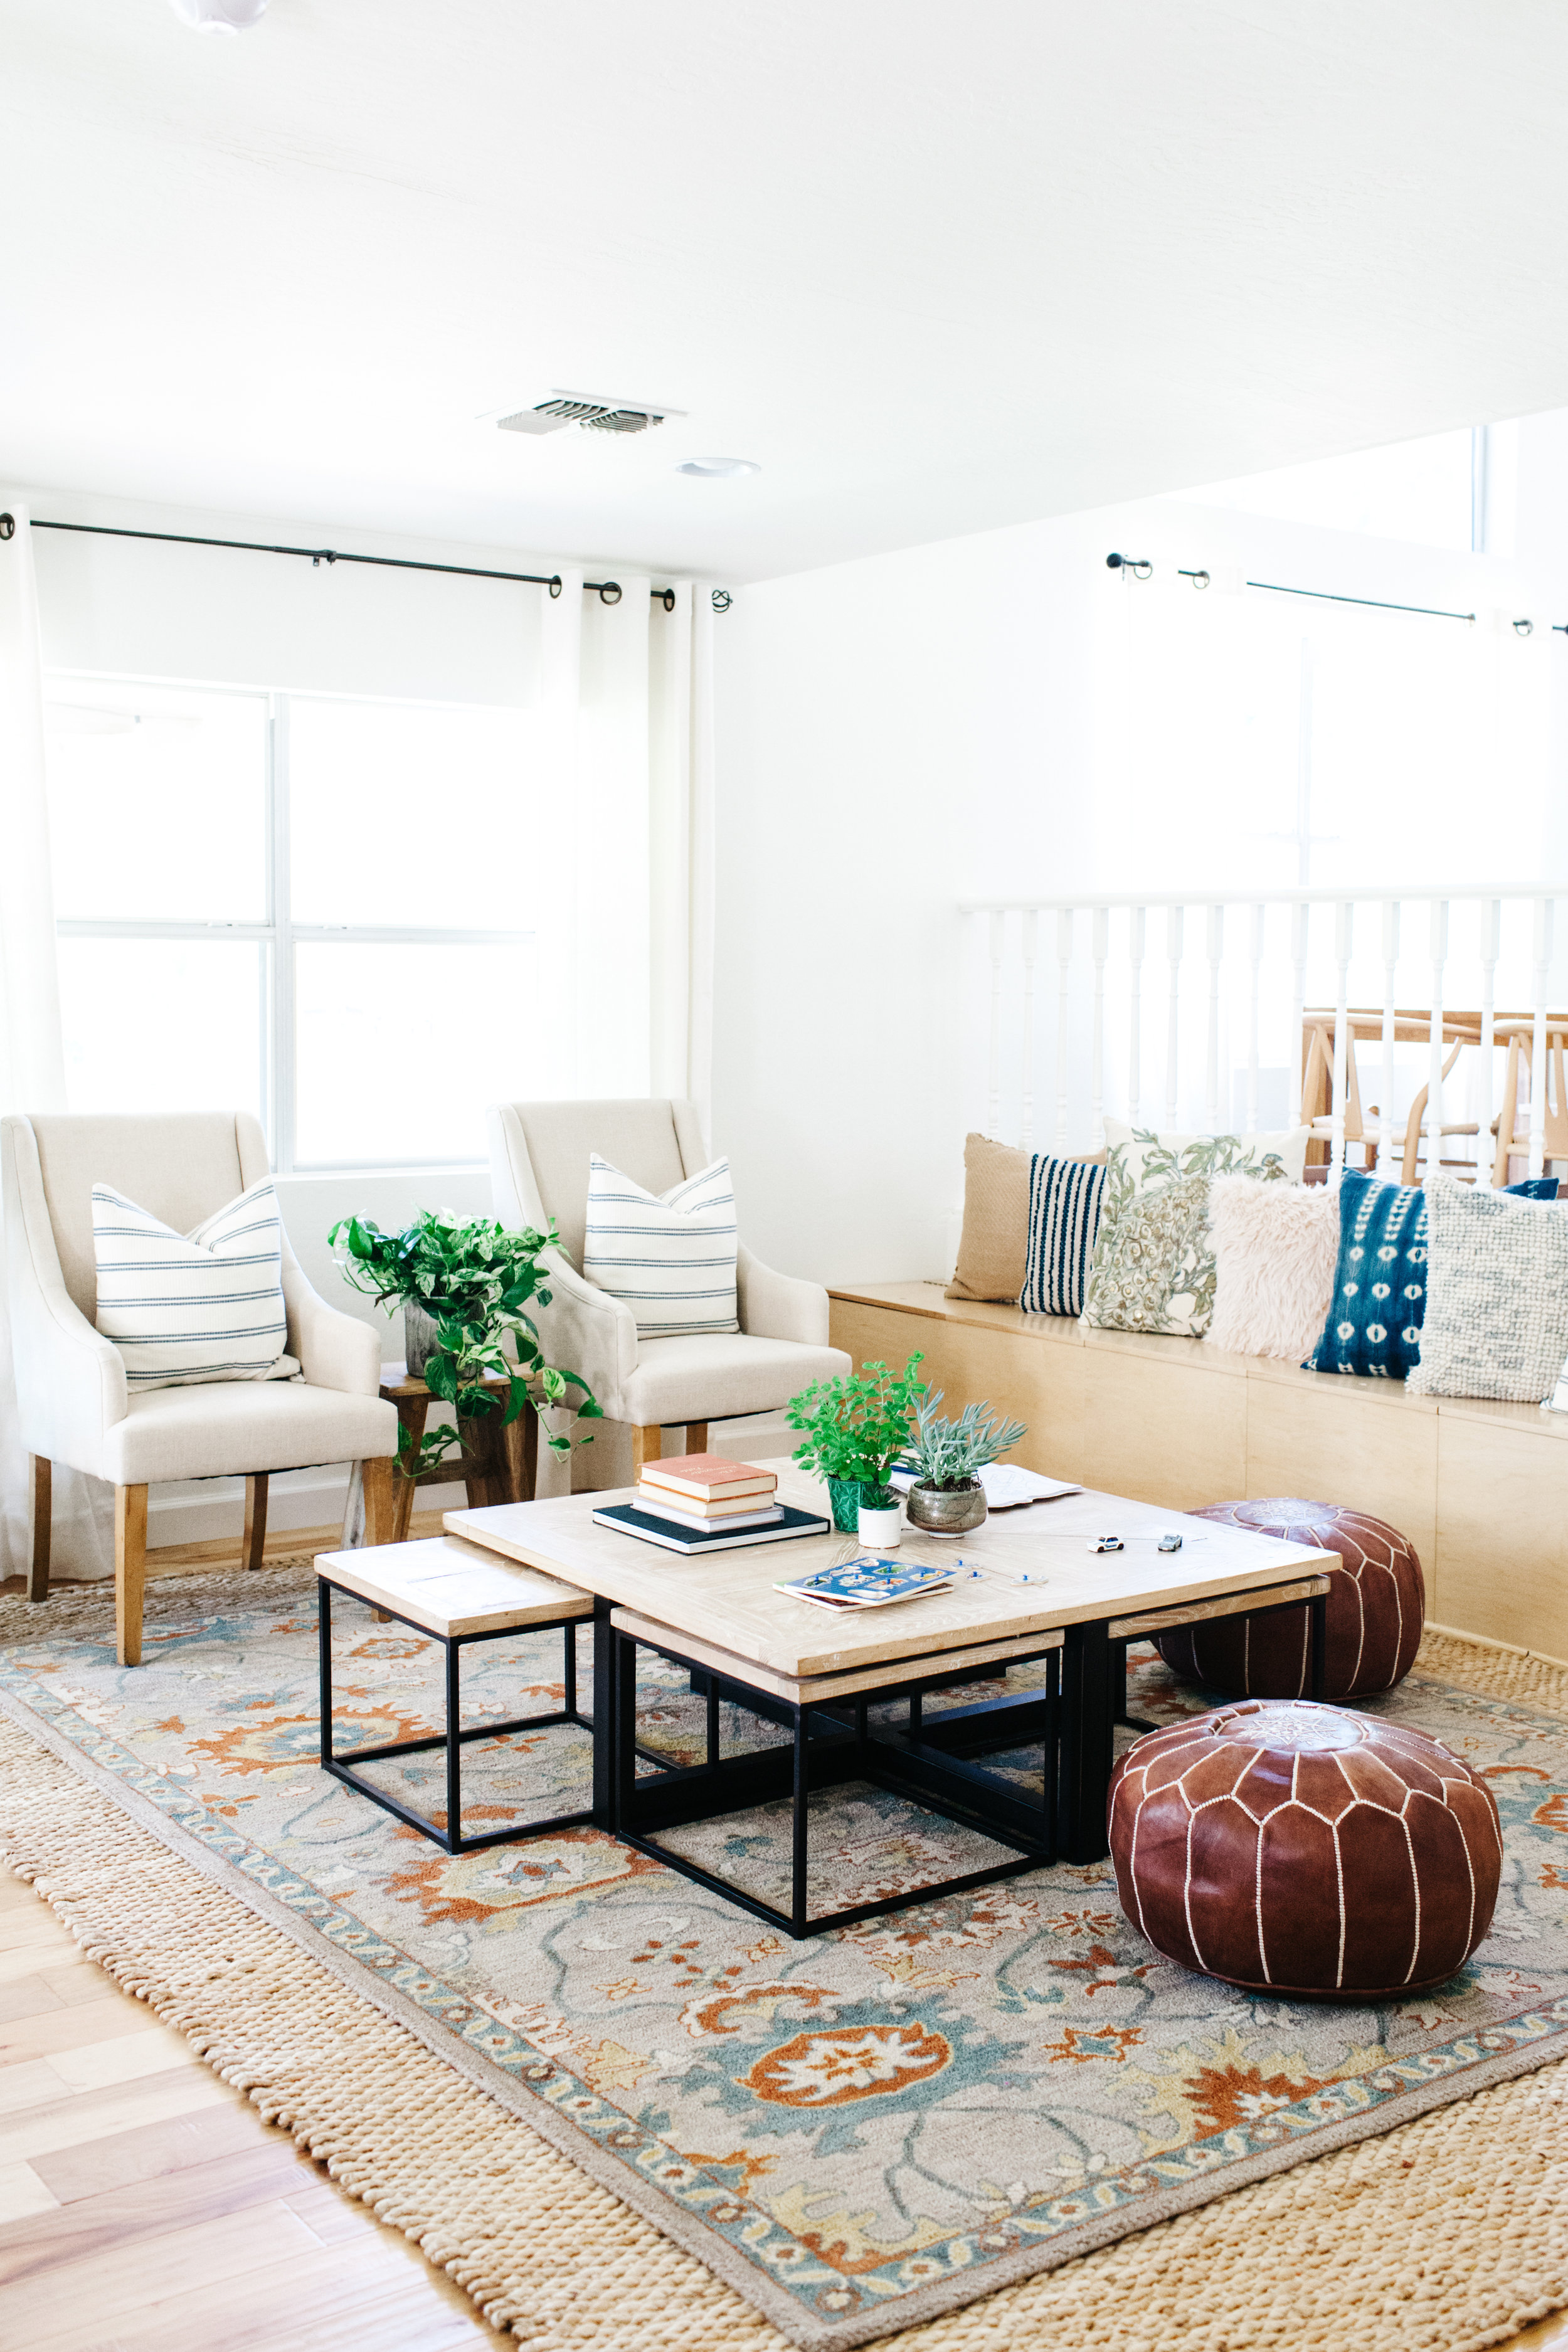
Once it was installed, I knew I needed to put some textiles on top of the bench to make it more cozy. I'm also not a fan of the traditional banister, so pillows help disguise it a bit. I chose blues to tie in the blue in the kitchen, earth tones to tie in the family room and blush pink to tie in the dining room (all spaces you can see from this area).

Since the kids play in this space I wanted to have a table for them to color on or play with their cars. It also serves as a great entertaining spot with comfy chairs and poufs. Adding an area really defined the spot too, and now it's obvious that this room is great for sitting and playing.

Now, I'm sure you are wondering how the kids get to their toys with all of those pillows on it. Well, the pillows are often on the floor, but because it's all very cohesive it doesn't bother me. It just feels like a cozy spot no matter if things are in disarray or in order.
I'm so pleased with how this project turned out. Be sure to head over to Elisha's blog for the DIY details and use PureBond for your next project. Stay tuned for more updates on our family room space in the coming months.
Photos by Rennai Hoefer.